Showing posts with label repurpose. Show all posts

Friday, March 17, 2017

Project Run and Play: Greenery


I really enjoy sewing along with the challenges for Project Run and Play.  It helps me to maybe sewing things that I wouldn't normally or learn more about sewing in general.  This week I discovered that I don't buy green fabric.  I don't have anything against green, I just don't buy it apparently.  Given that this week's challenge focused on green, I had to think about how I was going to get it without actually having to buy more fabric (I'm trying to be good, I promise).  I was very tempted to get out the green dye from my tie dye kits and try to make a gingham like pattern, but I didn't was the mess or hassle.  Then one day I was putting something away in my closet, when I saw a dress I made when I was first learning to sew that I don't wear (the sewing on it is a bit embarrassing).  It just happened to be green.


So the outfit I made is green in a couple ways, color obviously and it has been recycled a few times.  The green fabric started out as a sheet before I turned it into a dress and the tan fabric was a slipcover I made for a couch that didn't turn out well before I used it in the dress as lining.


The pattern is Zephyr from Figgy's.  I changed the straps to be able to tie at the shoulders.  I've made it a couple time and the button loops always give me problems coming out the seam.  If I make it again, I will have to remember to find a way to improve on it.


The bows are so cute!

Monday, June 6, 2016

Changes to the House

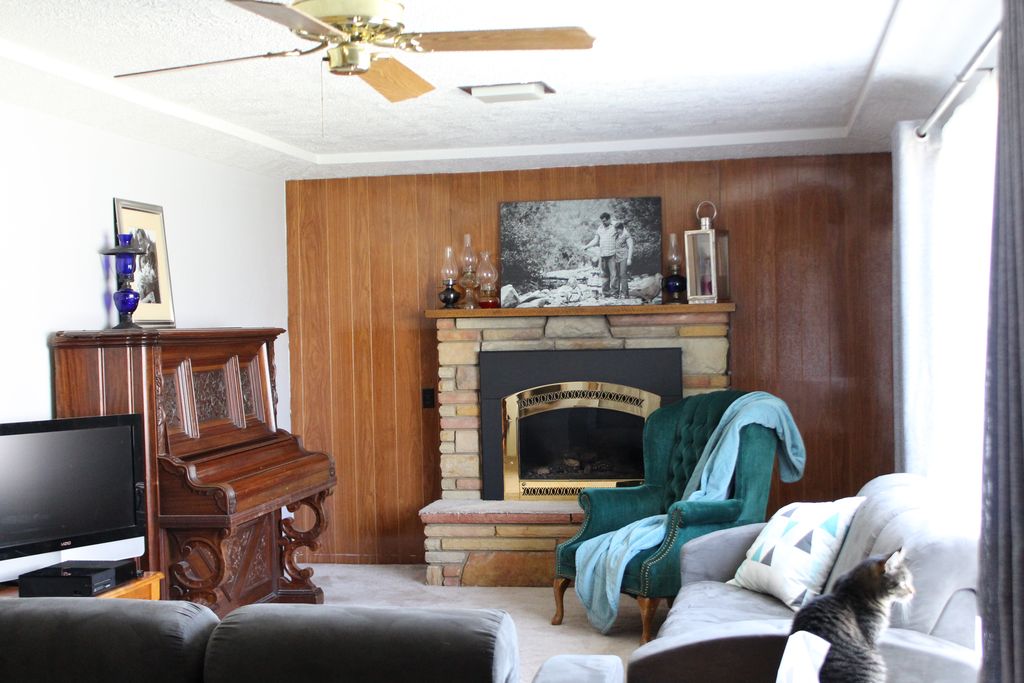
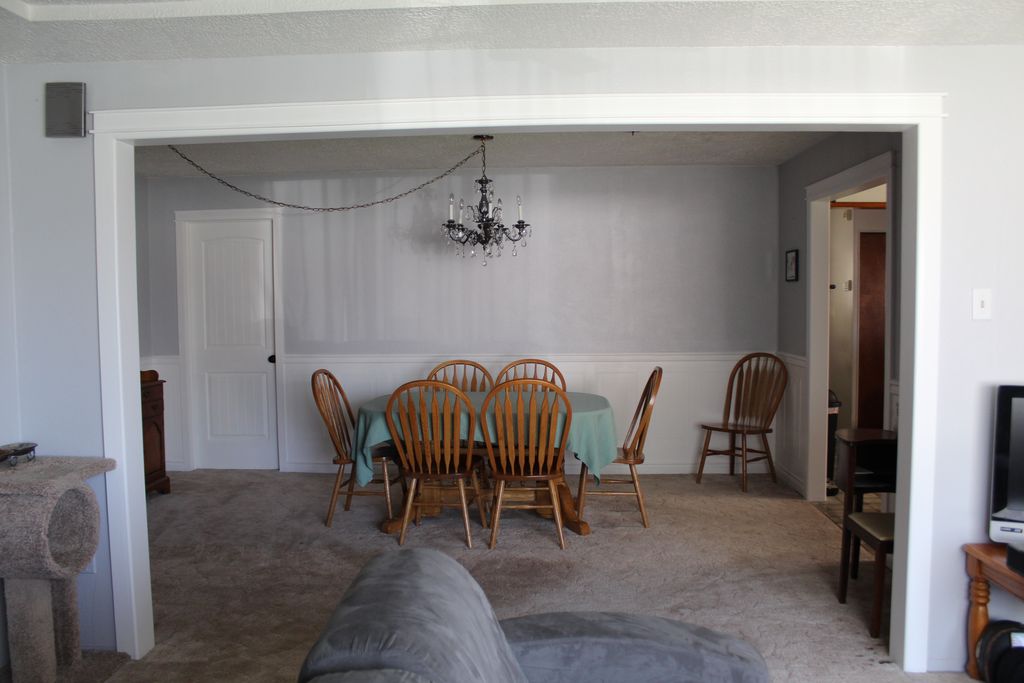
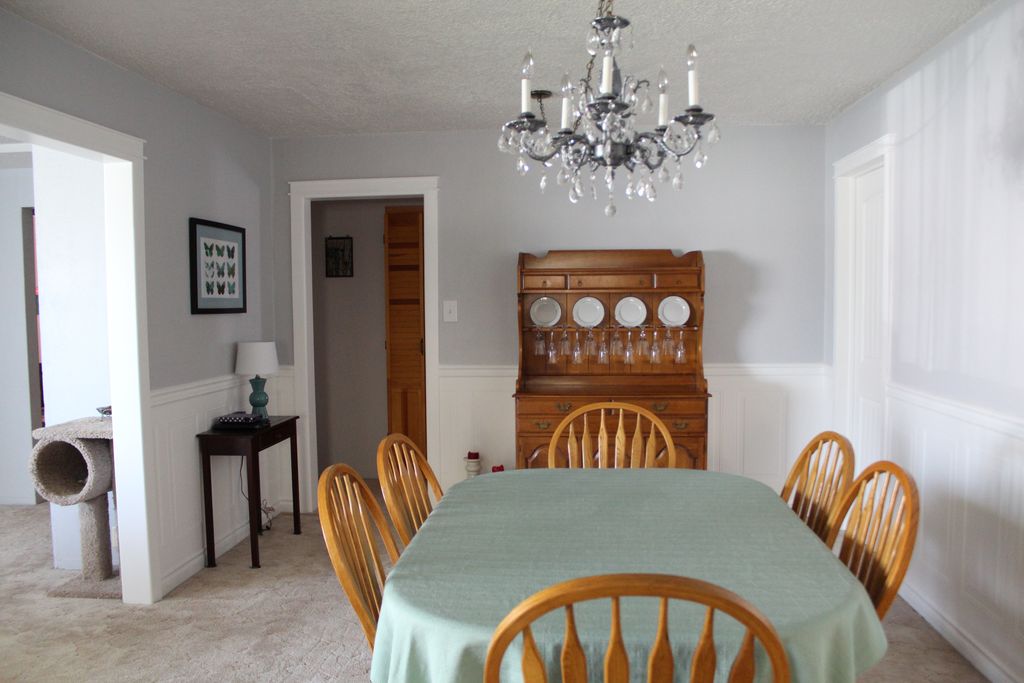
We are in the process of selling our house, so I thought I'd share some before and after pictures of what we have done.  There is so much more I would have liked to have done, but I'm looking forward to the next adventure.


The before pictures are from the listing from when we bought the house.


In the living room, we painted the walls Silver Screen by Behr .  I made curtains from a grey burlap type of fabric and changed out the rod.  I also flipped the paddles on the fan to hide the wicker insert.  The square light fixtures had been painted red (I'm not a fan of red) so I painted over that with a metalic pewter paint that I used on the chandelier.  We had planned on making cabinets to go on both sides of the fireplace and paint that wall white and I wanted to convince Michael to let me paint the brick (I'm not a fan of orange either).


We did the most in the dining room.  When we moved in the whole large wall was covered in floor to ceiling mirrors.  They went out as soon as we could remove them.  The girls would spend the whole meal just staring at themselves.  


Later, I painted the chandelier (you can read about that here) and the walls were painted the same as the living room. We changed the door to our room.  It was a pocket door which our cat would rattle through out the night and wedge open.  We added a craftsman style trim around the entry ways, wainscoting, chair rail, and baseboard trim all painted in ultra pure white.


Changing the trim around the kitchen entryway made a huge mess so we had to fill that in and painted.  I used Niagara Mist from Behr.


To create more space, Michael made a cool pot rack using plumbing supplies and put up some shelves.


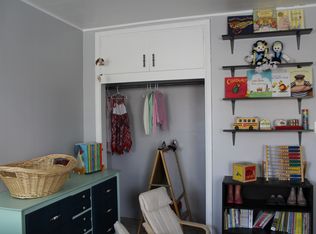
In the girls' room, we painted walls, trim and ceiling the same colors as the living room and dining room.  We also put up some shelves and changed out the blinds.


Other than some other little things, I think that is about all we did inside the house.  We had a lot more plans and ideas, but we are looking forward to getting another house we can personalize when we move.


Thursday, May 21, 2015

Project Run and Play May:Summer Chevrons Shirt


This month for Project Run and Play, everyone is working with Crafty Cupboard's Summer Chevrons Shirt.  


For my version, I used knit and left off the elastic waist, because shirts like that tend to get caught on her little belly.  Since it was for her and I wanted a few minutes quiet while she rummaged, I let Laurel pick the fabrics.  The kitty knit is from an inexpensive 3xl tank top that I got to make something for the girls.  


By the time I took these pictures, she had already worn it several times (and at the end of a full day field trip with kindergartners).  I probably should have ironed it, but it is a shirt for a child and who has time for that.  I also only got these few pictures, though a couple are from the field trip, because the battery on the camera died.  It has been a long day.


The changes I made was to curve the neckline and not include the waist elastic or the button closure.

Friday, June 27, 2014

Sewing for Me: Ottobre 2/2011 #1 Trento


I've been a bit frustrated with my lack of options for shirts, so I've been making an effort to make more time to sew for me.  This is one that I really only like in this outfit.  The shirt turned out way too short, even after adding to the pattern length.  I used a clearance nightgown for the fabric so it is nice and soft.  The pattern is Ottobre 2/2011 #1 Trento.  I have a favorite t-shirt pattern, but thought I'd give this one a try for more variation.

Monday, November 4, 2013

Fabric Bucket


With the fabric left over from my new trash can, I decided I wanted to make a fabric basket for my girls' Duplos.  They broke the drawers that they were in so they've needed a new home for a while now.  


I'm not going to tell you how I put it together since there a bazillion tutorials out there.  No need to reinvent the wheel.  I just threw it together with old jeans as the lining and braided rope as the handles.  I love how it turned out and it took less than an afternoon to sew up!  As a bonus it holds all of the Duplos and will be really hard for them to demolish.


Monday, October 28, 2013

Laundry Canister Upcycle


While I was doing some unexpected (for me) housekeeping for Camp, I found the coolest container.  My husband recently changed janitorial suppliers so now the laundry detergent comes in a fiber canister rather than a plastic bucket and there just happened to be one sitting empty in the laundry room.  I asked Michael if I could have it and he said I could.  I knew it would be perfect for a trash can for our home school room.  Yay for not having to buy one!


It was really easy to transform. I measured around the top to find out how long I needed the fabric. Then all I did was turn the edges over on my piece of fabric, so no raw edges would show and hot glued it around the bottom, then the edges running up the side and then again along the rim on the inside.  Super easy!  I think it would also look really fun done with rope or twine.


Now, I'm wanting to volunteer to do laundry for Camp to speed up getting another one for my sewing room!

Sunday, April 28, 2013

Alphabet Tree


We have just started using the Letter of the Week curriculum from Confessions of a Homeschooler.  Part of it involves putting letters on a tree like in the book, Chicka Chicka Boom Boom.  

I'm not much of a fan of palm trees, so I decided to make my own deciduous tree.  I tried free handing one, but I didn't like the look of it at all.  I searched Pinterest  for "diy wall tree" and found a free template that I could use.  I wish I could have painted it like it was intended, but I didn't want something so permanent.  I had thought about tracing it on some cardboard, but the image in my head didn't look so great, so I used construction paper.
Since construction paper is larger than printer paper, I printed it on printer paper, taped it and cut it out.  Then I traced it onto brown construction paper taped together and cut it out.  Then I taped it to the wall and cut out all the leaves from green construction paper and taped them up.  Other than being able to see all that tape, I really like it.  It is super cute and perfect for our school room.

Sunday, April 21, 2013

Mom Shirt Re-purposed to Kid Pajamas

This is one of my recent projects I thought would be fun to share today since tomorrow is Earth Day.  It is a good re-purpose project.  

One of the shirts I've had for quite some time decided to develop a hole near the hem so I thought it would be fun to turn it into pajamas for Eleanor (although with all her growth spurts lately they should probably be going to Laurel already).  I tried to find a picture of it in it's first life, but couldn't so you only get to see Eleanor.


It was one of those kinds a shirts made to look layered.  I seam ripped off the tan deer long sleeved section and used another pair of pajama bottoms to get the right cut for the top part of the leggings and used fold over elastic at the waist.  I used a pajama top to cut out the main part of the shirt.  I made sure to use the neck as is, because I'm not too fond of doing binding.  For the sleeves, I left the hem intact and just cut off all the old seams, then gathered it and sewed on.  The bottom of the shirt was left not hemmed to give it more length (needed thanks to a growth spurt).


They are some pretty fun pajamas.  I love the deer and apple tree!  I just need to figure out more clothing for her or rather find more time to sew more clothing for her and apparently Laurel is going through some spurts of her own.

Monday, February 18, 2013

Collar to Crown

I thought it would be fun if I told you how I created the darling crown I showed in the Dress Shirt Challenge post.  I didn't take pictures as I went, but it was super easy.


First seam rip the top portion of the collar (that part that folds down) off a dress shirt.  Next hem the raw edge.  Over lap the two short edges slightly and stitch them down.  Last, but not least take some buttons and sew them on as jewels.  I used the spare buttons from the dress shirt.

Monday, February 4, 2013

Project Run and Play Sew Along Week 5


The Men's Dress Shirt Challenge is what I had to work with this week for Project Run and Play's Sew Along.  Once again I pulled my inspiration from Pinterest.  I choose two post to base this week's outfit from here and here as well as a little something all my own.


I started with a plain white dress shirt stolen from my husband.  Then I used some leftover dye from a tie dye kit, I had from dying stained baby onesies to dye it a super pale turquoise.  I love how the color turned out, although I should have done my seam ripping before dying, because now there is an interesting pocket shaped less dyed spot.

She's getting over a cold, so I could only get to to take pictures if she got to sit.

Using tutorials that don't provide pattern pieces, remind me how much I need a physical pattern.  They didn't turn out exactly like I had hoped, especially the pants that I ended up having to turn into leg warmers of sorts.  Oh well, it still turned out cute.


My favorite part is the the crown I made from the part of the collar that was seam ripped off.


Wednesday, January 2, 2013

Crib Front to Fabric Display

Happy new year!  I know a lot of people resolve to be more organized, so I thought I would share how I keep part of my fabric hoard supply tamed (the rest is still very wild).

A while ago, I came up with a really fun way to display some of my fabric.  Shortly after we converted Laurel's crib to a toddler bed, I was trying to figure out what to do with the crib front so that it wouldn't just sit in the closet driving me crazy in the way.  Being a fabric hoarder I tend to have a problem finding a place for all my fabric and keeping it organized.


Somehow I realized I could kill two birds with one simple stone.  I leaned the crib front against the wall and hung a bunch of fabric on the rungs.  Super easy and free!  I thought it was rather clever and pretty.


I also folded some of my larger scraps and put them into a basket with my baker's twine and ric rac.


Monday, November 12, 2012

Sewn Hats: Quick Snuggle Hooded Scarf

The weather here has turned decidedly more winter and low and behold my girls have outgrown all their winter hats.  I found this out when I tried to get them ready to be outside in 32 degree weather to 'help' Daddy collect firewood.  When their hats didn't fit, they got to wear mine, even though they were way too big, and I got to wear one of Daddy's.  The one Laurel was wearing kept falling over her eyes.  It was really cute.  Their coats have hoods. but they didn't want to stay on, so I knew I needed to break down and make something to keep their little heads warm.

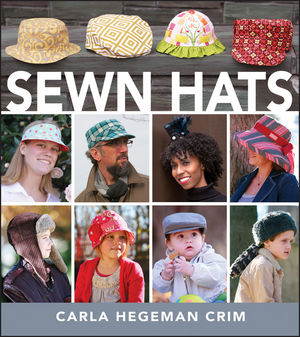
Sometime this summer, I was given the book Sewn Hats, and from the start I knew I wanted to make the girls the Quick Snuggle Hooded Scarf by The Scientific Seamstress.

Source
Right after lunch after we got back from walking down the hill in the cold with no hats (the car battery died while we were up there), I pulled it out and got to work.  I wanted to use my caterpillar fleece I used here, since it is so cute and it is the only fleece I've bought.  I had about half a yard and it called for two fabrics in half a yard each and I had two girls to make them for.  Wracking my brain, I realized I had a bunch of fleece blankets I rarely use and one that I've never even opened.  The unopened one was yellow and would be perfect to go with the caterpillars and I had a fun frog blanket and a gray one to use for the other.

The title says this is quick, but for me it wasn't.  My printer ran out of ink so it didn't print the last pattern page till I threatened it.  Then some things came up at my husband's work that ended up in my running around making a dozen beds and I didn't get back till it was time for dinner, then the girls bed time.  I usually don't sew after they go to bed because my sewing machine is in the room right next to them and I want to spend time with Michael.  All in all, I got one of the two cut out.

The next day we woke up to six inches of snow and still snowing, which tells me I had better get these hats made pronto.

Michael took this for my on his phone after dark.  I'm pretty sure those lines are the trails of snowflakes.
I got them done and love how they turned out!  I love how low they are on the back of the neck and thanks to the scarf part they stay on great.  They are so cute!  They make me think of winter bonnets.  The only change I made was that I top stitched around to help keep down the puff.  I like tidy seam edges.  

Monday, September 17, 2012

Elysium Pattern Underwear Style Training Pants

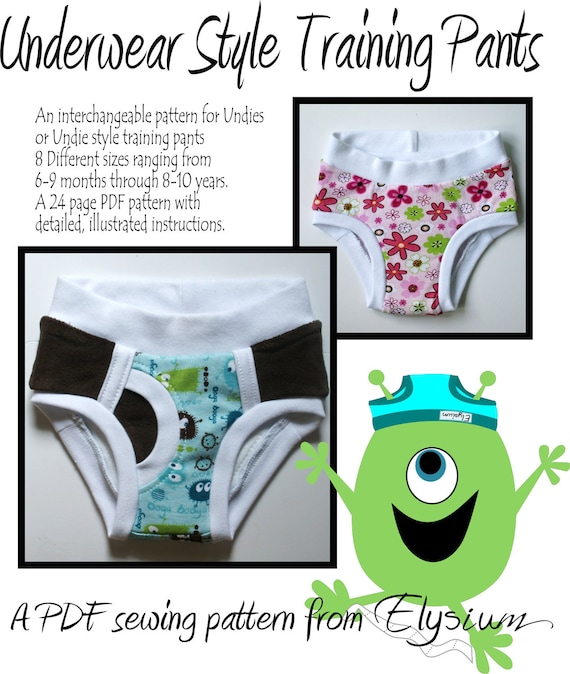
Recently, I bought a pattern in preparation for potty training (again).  We've tried Pull-ups and hated them.  We've tried panties only 3 day methods and had a huge breakdown.  So now that the girls are having tantrums wanting to use the potty, we are going to try again.  I wanted to try training pants so that it is a little less stressful than just panties and less messy, but it had to be reusable and inexpensive. I searched for hours upon hours for a free pattern online that I liked the look of and that I thought would meet my needs.  I gave up on that.  Finally, after more hours of searching on Etsy, I decided to give this pattern a try.

Source

I liked the look of Elysium's Underwear Style Training Pants and loved that it could be used to make regular panties later.  So I gave it a try.  It was so easy, which was great, since I needed to make twenty pairs.  I never had a chance to time how long it takes from start to finish (thank you my darlings), but they felt very speedy when I had a chance to work on them.  The directions are very easy to follow with lots of pictures.  I would say even a beginner at sewing could make these.  The only problem I had was knowing which size to do was really unclear.  I ended up making a test pair that I was pretty sure would fit at least one of the girls and then try it on them.  After that I had a much better idea of which sizes I needed.

For the most part I used what I had on hand to make them.  I used a bunch of old t-shirts and out grown/ holey/ stained baby sleepers.  For the soaker part, I used three layers of scrap cotton batting.  The only part I paid for  (besides the pattern) was elastic.  I did change one thing in the pattern which was that I changed the soaker part by adding a water proof section that I cut from an old jacket to help keep down messes.  In whole, this was a very inexpensive way to get a bunch of training pants.  


My opinion is that this is a great pattern and the girls love how they look.  The girls have worn them a little in a very casual go at potty training and they do help prevent big puddles on the floor.

Monday, April 9, 2012

Lumber Jill Dress Tutorial

I'm still going through that box of boy clothes.  There were a couple flannel shirts in there that had me stumped. I searched google and pinterest for hours looking for inspiration.  I gave up.  I don't know how the idea came to me, but it did.  I decided to turn one into a dress.  Empire waist with a gore skirt.  Besides, the box of boy clothes, I also have a ton of old jeans, so I wanted to use some for the skirt.  To go with the jeans and make it fun, girly, lumber jack like, I did french seams on the skirt.  

If you want to make one, follow along.
  (One disclaimer, mine doesn't actually fit the child it was intended for, so measure, measure, measure.  Please, make sure it has enough room so the arms can go into the sleeves.)

Take a shirt that fits your child or maybe is a little big.


Put it on your child to see where you would like it to end and the skirt to start.  Take it off of child and cute a little below that.  (This is where I should have gone lower so that there would have been more room to put it on.)  Seam rip sleeves, pockets (optional), and any other items on it that bother you (like that weird beige tape on the side seams).


Then take the sleeves and cut them into something that might turn into a cap sleeve.  I guess every time and usually, even if it isn't what I had in mind, they turn out cute.  I folded them at the top and cut in a gentle curve, keeping the the original sleeve seam/edge in tact.  I fold to keep both sides of the sleeve symmetrical.  Then I use the first one as a pattern for the second one.


Hem the sleeves.  I ruffled them along the seam side and then reattached to the shirt.
Next, comes the skirt.  I used a  tutorial I found to base my pattern piece off of.  It was really handy and took care of all the figuring I would of had to do on my own if I didn't find it.  Instead of 12 gores, I did six.  I did the bottom measurement double the waist and then added a two inch hem.  Since, I made it for a toddler with no hips I only worried about the waist measurement.  I also think it is better to err on the side of big.  If need be, you can always add elastic, gathers, or pleats to bring it in.


Here is another place you can learn from my experience and not do what I did.  I sewed the seams in an assembly line style doing each step of the french seam on all the seams at a time.  It is best to do the whole french seam before going to the next.  Working with a tube the size of a two year old's waist on a large sewing machine can be a pain.  So sew on a sheet, not a tube.  You will only have to work with a tube for the last seam.
Sew two gores wrong sides together and right sides facing out.  I know this seems backwards, but it is what you need to do.

Trim the seam allowance and sew right sides together 3/8th from the first seam along the fold.  This will encase the raw edges.


Next sew down the casing with the right side facing up 1/4 of an inch from the seam.  I like to pull the fabric tight while I sew it to make the seam look nicer.  I'm not sure if it helps or not, it just makes me feel better.  Make sure to sew the casings down on the same side of the stitch ditch all the way around.


Sew the shirt and skirt together.  Put on your child and decide where you want to hem and then hem. 

After I had it all done, I didn't like the back and the loop.


So I took one of the pockets I seam ripped, pleated it and sewed in over the loop.


So now you have a cute dress, worthy of any Lumber Jill, that hopefully fits.


I looks like it will fit Laurel, but she threw one of her worst tantrums ever when I tried to put it on her, thus the sad childless picture at the end.  I'm pretty sure I'm going to break down and seem rip the top and try again with another shirt, unfortunately it won't be the lovely red flannel.