Showing posts with label craft. Show all posts

Sunday, July 24, 2016

Bookworm Birthday!


Eleanor just turned 7!  To celebrate we had a little Bookworm Party at the park with some friends and family.  I didn't do a ton for it, but wanted to share a little of what I did do.  If you want to see my inspirations for this party, you can see them on my Pinterst board.


I made invitations to look like library cards.


My frosting job was beyond terrible, because I did it at the park and the cupcakes were sticky, but the fondant books and bookworm we made were really cute.


I used the 3D letter printable from Mr. Printables and glued book pages to the back before cutting out.  It took some reengineering since I made the letters inside out, but it wasn't too hard to figure out.  The worst part was being in the depths of despair from cutting up an "Anne of the Island" book I got from a thrift store.


Since the book was already cut into, I figured I might as well use it to make my wrapping paper and bow.  I love how where the pages meet it looks kind of like ribbon was wrapped there.


Eleanor just devours books (thus the bookworm theme) so we asked that if the guests wanted to bring gifts that they bring books.  She finished reading one of the chapter books in less than a day and a half and it would have been sooner, but we forced her to play at the park.


Monday, June 6, 2016

Changes to the House

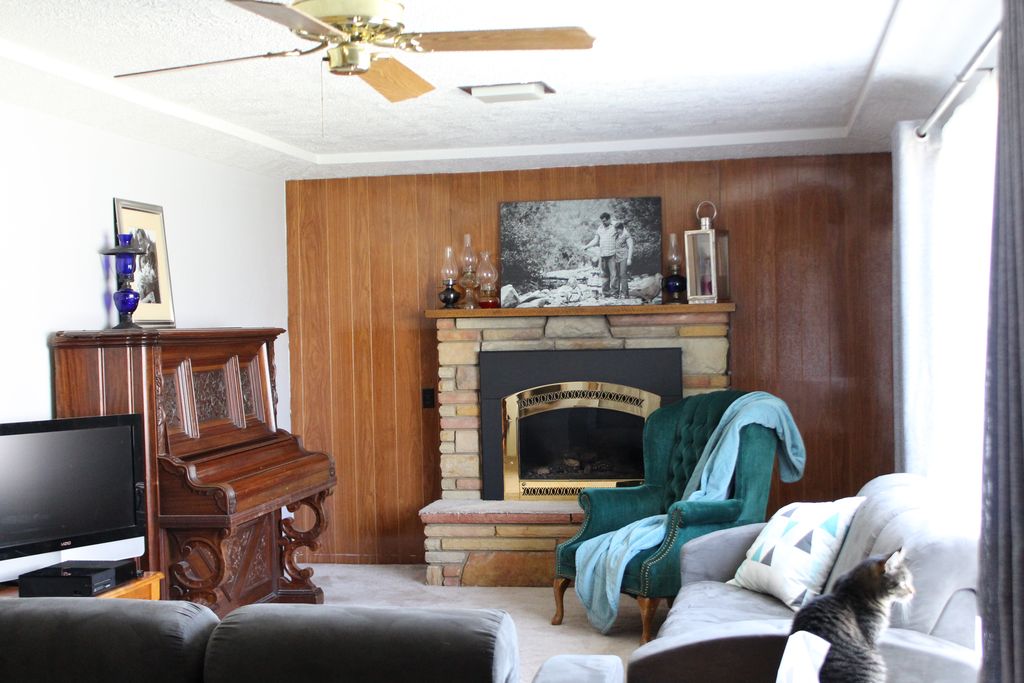
We are in the process of selling our house, so I thought I'd share some before and after pictures of what we have done.  There is so much more I would have liked to have done, but I'm looking forward to the next adventure.


The before pictures are from the listing from when we bought the house.


In the living room, we painted the walls Silver Screen by Behr .  I made curtains from a grey burlap type of fabric and changed out the rod.  I also flipped the paddles on the fan to hide the wicker insert.  The square light fixtures had been painted red (I'm not a fan of red) so I painted over that with a metalic pewter paint that I used on the chandelier.  We had planned on making cabinets to go on both sides of the fireplace and paint that wall white and I wanted to convince Michael to let me paint the brick (I'm not a fan of orange either).


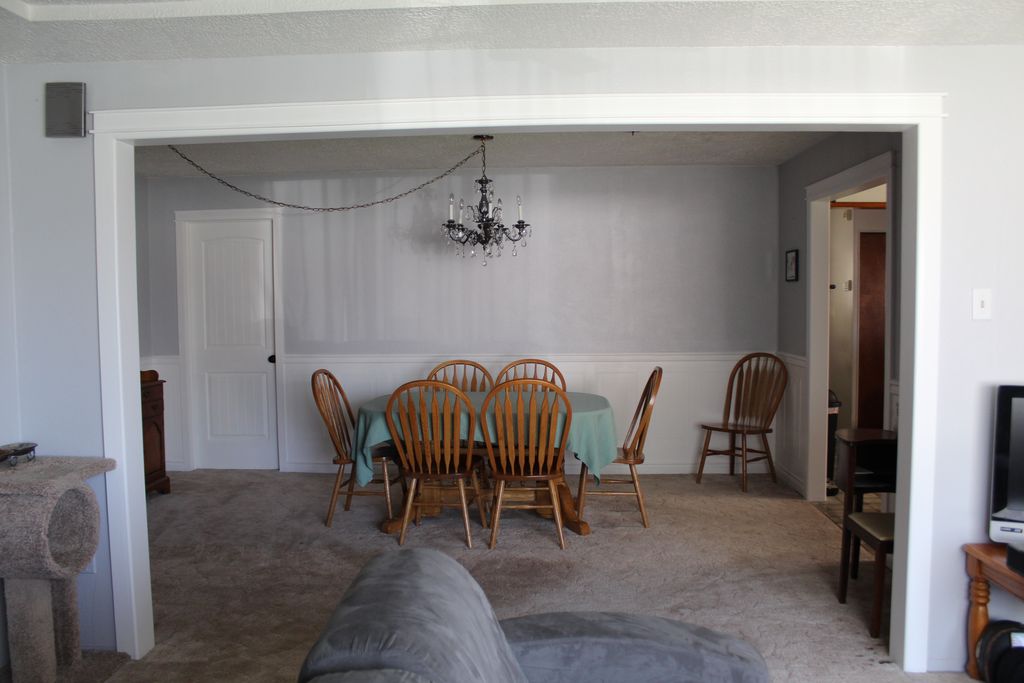
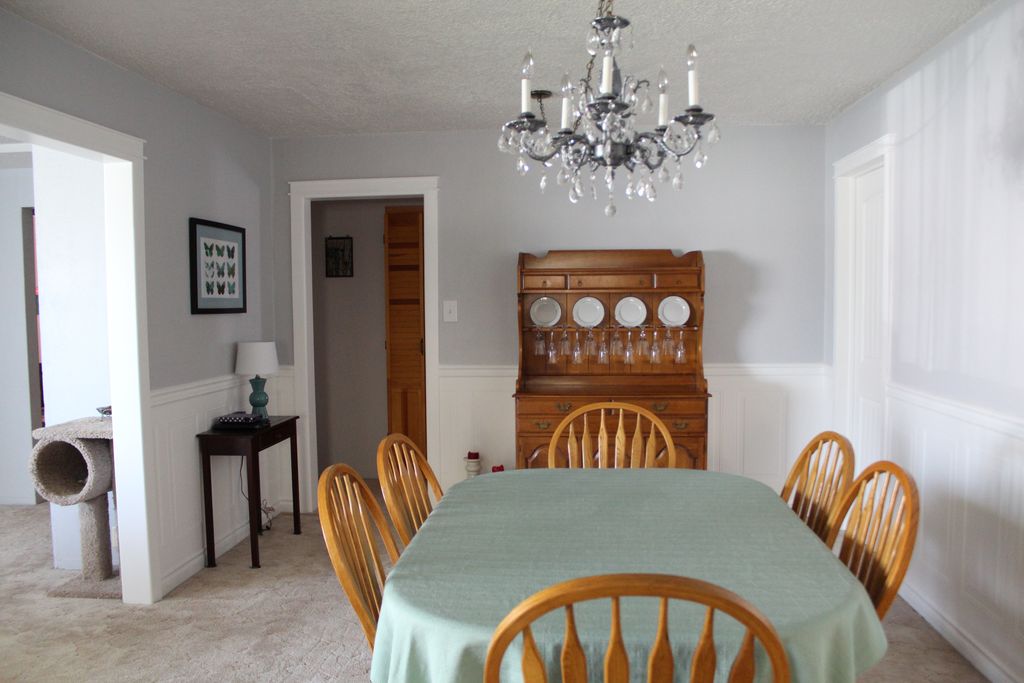
We did the most in the dining room.  When we moved in the whole large wall was covered in floor to ceiling mirrors.  They went out as soon as we could remove them.  The girls would spend the whole meal just staring at themselves.  


Later, I painted the chandelier (you can read about that here) and the walls were painted the same as the living room. We changed the door to our room.  It was a pocket door which our cat would rattle through out the night and wedge open.  We added a craftsman style trim around the entry ways, wainscoting, chair rail, and baseboard trim all painted in ultra pure white.


Changing the trim around the kitchen entryway made a huge mess so we had to fill that in and painted.  I used Niagara Mist from Behr.


To create more space, Michael made a cool pot rack using plumbing supplies and put up some shelves.


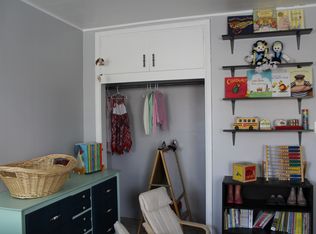
In the girls' room, we painted walls, trim and ceiling the same colors as the living room and dining room.  We also put up some shelves and changed out the blinds.


Other than some other little things, I think that is about all we did inside the house.  We had a lot more plans and ideas, but we are looking forward to getting another house we can personalize when we move.


Monday, October 28, 2013

Laundry Canister Upcycle


While I was doing some unexpected (for me) housekeeping for Camp, I found the coolest container.  My husband recently changed janitorial suppliers so now the laundry detergent comes in a fiber canister rather than a plastic bucket and there just happened to be one sitting empty in the laundry room.  I asked Michael if I could have it and he said I could.  I knew it would be perfect for a trash can for our home school room.  Yay for not having to buy one!


It was really easy to transform. I measured around the top to find out how long I needed the fabric. Then all I did was turn the edges over on my piece of fabric, so no raw edges would show and hot glued it around the bottom, then the edges running up the side and then again along the rim on the inside.  Super easy!  I think it would also look really fun done with rope or twine.


Now, I'm wanting to volunteer to do laundry for Camp to speed up getting another one for my sewing room!

Monday, January 21, 2013

Chore Chart

Soon after the start of the new year, my husband and I put together a chore chart for our girls, to help us be more accountable for having them help routinely.  I looked at lots of free versions and choose one that I thought was really cute and fun and as it turns out the girls think so to.  


It was so easy to put together.  I just printed out all the sheets (two of the chores, since we have two children) and cut out the pieces.  Then I put a little glue stick on the chores to keep them from sliding while I laminated them, cut them out again  actually I got my husband to, hehe) and put a little bit of adhesive magnet strip on the back.


The girls love it!  When we ask if they want to do chores, they cheer and get so excited and run to the fridge to see what they get to do.  Then after they finish it we return to the fridge so they can get their 'scoop' to put on their cones.  We only started with a few to see how it would go and to not overwhelm them, but it is going great so I may add a couple more soon.


If you are curious, we have Eleanor (age 3) feed and water pets, brush hair, make bed, read, pick up toys, and brush teeth.  Laurel  (age 2) does all of those except feed pets, instead she gets to nap.  The next chores I'll add will be clearing and setting the table at each meal.  We already have them help, but it can be a struggle that I hope their chore chart could help fix.

Wednesday, January 2, 2013

Crib Front to Fabric Display

Happy new year!  I know a lot of people resolve to be more organized, so I thought I would share how I keep part of my fabric hoard supply tamed (the rest is still very wild).

A while ago, I came up with a really fun way to display some of my fabric.  Shortly after we converted Laurel's crib to a toddler bed, I was trying to figure out what to do with the crib front so that it wouldn't just sit in the closet driving me crazy in the way.  Being a fabric hoarder I tend to have a problem finding a place for all my fabric and keeping it organized.


Somehow I realized I could kill two birds with one simple stone.  I leaned the crib front against the wall and hung a bunch of fabric on the rungs.  Super easy and free!  I thought it was rather clever and pretty.


I also folded some of my larger scraps and put them into a basket with my baker's twine and ric rac.


Tuesday, November 27, 2012

EvgieNev Wall Decal

Recently, I won a pretty awesome giveaway, so I thought I would share what I did with my bounty.  I got a wall decal from EvgieNev.  I picked out a beautiful design with bird cages, but it was too big for the space I wanted it in, but that wasn't a problem at all.  They were super amazing to work with!  They shrunk it down and I also got to customize the colors.


It came right before we left to visit my parents for Thanksgiving, but as soon as we got home I started putting it up.  Here are some befores of my girls' room.  


It was fairly easy to put up, time consuming and sometimes frustrating, but mostly easy.  I tried to follow the directions as closely as possible and it did get faster/easier as I went.  Although, the birdcages were super hard.  It took me part of an evening and part of a morning to do.


I just love how it all turned out!  While I'm at it, I might as well show off a few more details in the girls' room (since it was clean at the moment I was taking pictures).  Most of the decor items in there I made.


We'll start above Eleanor's bed.  The prints are from hours of scouring Pinterest for free bird printables.  The nest one is from here, the bird cage one is from here and the last print is from here, but I cut a pasted a bit to get it to look like that.  The stork with the heart was made using the book, Little Birds.  The little bird in the corner was supposed to be a door stop for my bedroom, but it wasn't heavy enough so it went into the girls' room.  I can't remember where I got the free pattern.


Over to Laurel's side, the tiny bird, mobile, and wreath were all made using the Little Birds book again.  The framed pictures is of a bear dressed up like a bumble bee that I cross stitched for Eleanor's bee themed nursery.  I used the pattern from this book, from which I also stitched the alphabet, but I didn't take a picture of it.  Other items in the room I made are the drapes, valance, and roman shades.


As always, Eleanor and Laurel decided to help out.  I hope you enjoyed a little peek into the only room in the house with any sort of theme or even close to being put together.  If you have any more fun bird ideas, I'd love to see them!

Monday, November 12, 2012

Sewn Hats: Quick Snuggle Hooded Scarf

The weather here has turned decidedly more winter and low and behold my girls have outgrown all their winter hats.  I found this out when I tried to get them ready to be outside in 32 degree weather to 'help' Daddy collect firewood.  When their hats didn't fit, they got to wear mine, even though they were way too big, and I got to wear one of Daddy's.  The one Laurel was wearing kept falling over her eyes.  It was really cute.  Their coats have hoods. but they didn't want to stay on, so I knew I needed to break down and make something to keep their little heads warm.

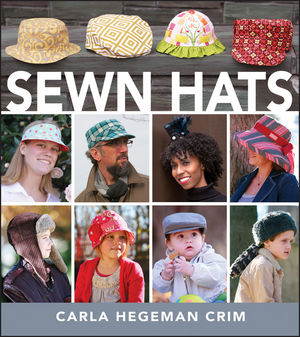
Sometime this summer, I was given the book Sewn Hats, and from the start I knew I wanted to make the girls the Quick Snuggle Hooded Scarf by The Scientific Seamstress.

Source
Right after lunch after we got back from walking down the hill in the cold with no hats (the car battery died while we were up there), I pulled it out and got to work.  I wanted to use my caterpillar fleece I used here, since it is so cute and it is the only fleece I've bought.  I had about half a yard and it called for two fabrics in half a yard each and I had two girls to make them for.  Wracking my brain, I realized I had a bunch of fleece blankets I rarely use and one that I've never even opened.  The unopened one was yellow and would be perfect to go with the caterpillars and I had a fun frog blanket and a gray one to use for the other.

The title says this is quick, but for me it wasn't.  My printer ran out of ink so it didn't print the last pattern page till I threatened it.  Then some things came up at my husband's work that ended up in my running around making a dozen beds and I didn't get back till it was time for dinner, then the girls bed time.  I usually don't sew after they go to bed because my sewing machine is in the room right next to them and I want to spend time with Michael.  All in all, I got one of the two cut out.

The next day we woke up to six inches of snow and still snowing, which tells me I had better get these hats made pronto.

Michael took this for my on his phone after dark.  I'm pretty sure those lines are the trails of snowflakes.
I got them done and love how they turned out!  I love how low they are on the back of the neck and thanks to the scarf part they stay on great.  They are so cute!  They make me think of winter bonnets.  The only change I made was that I top stitched around to help keep down the puff.  I like tidy seam edges.  

Friday, October 19, 2012

Ottobre Designs: Funky Boy Pants for a Girl.

I've been getting Ottobre Designs since Mother's Day and I love them!  They are so lovely and come together really easily and well (once I figure out what they are saying).  I've known for a while that Eleanor needed pants, but I was able to procrastinate for a while due to summer and calling her too-short-pants 'capris'.  But now it is cold outside and she has officially become too tall for all her pants.  One of the reasons I waited was, because I couldn't find a good jean pattern I liked (or for free).  I was torn on using the Funky Boy jean pattern from the issue 4/2012, because the pockets really bothered me.  They are fairly long and low.  Out of desperation, I gave in and gave it a try.


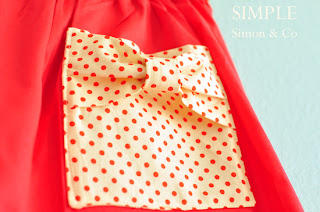
They were really easy to put together, up until the fly, but I am new at flies so it is all on me.  The only thing I changed was the back pockets and I accidentally put the coin pocket on the wrong side.  I used the Bow Pocket Tutorial by Simple Simon and Co.  Instead of using their measurements, did cut the rectangles a little smaller to match the width of the pocket pattern better.  I love how they turned out, I just wish I had been brave enough to place them higher.  With the pockets so low it makes it look like her pants of falling down, which they were, but made it look worse.  I think that if I use this pattern again I will bring the pockets up a lot closer to the back yoke.


The waist seemed a little snug and low, but open in the back, so I'm not sure how long they are going to fit.  I don't think they were intended for children who still wear diapers.  They are kind of like skinny jeans that are extra long.  For the most part, I'm happy with how they turned out and so is Eleanor.

The flower fabric I used in the pocket make me especially happy.

Sunday, October 14, 2012

KCWC: Final Results

This week turned out really productive!  Days One and Two, I was able to get two patterns traced out for the much awaited fabric.  


Day Three, I traced another pattern and cut out the pieces from fabric.  


Later that day, one of my packages of fabric came! Yay!  The only downside was that one of the fabrics I ordered mysteriously decided to become a blue damask home decor fabric instead of a blush pink stretchy cotton.  I've only been having problem after problem with this month's fabric orders, but that is way too much drama to go into.


Day Four, I was able to make a little progress on the top and got my new denim prewashed for Eleanor's new pants.  I also got my other box of fabric I had been waiting for.  I can't wait to make her the vintage footie pajamas, but they have to wait till after I make her pants.  I think she is down to one pair of pants and they might also be too short.

On Day Five, I spent extra time sewing (aka procrastinating on cleaning) today, since I knew I wasn't going to sew on Saturday due to it being our Sabbath and going to Michael's brother's birthday party till late at night.  The shirt is finished, though, except for the elastic shirring around the waist, since I don't have any elastic thread.  I even asked Michael to pick some up this week, but the Walmart employees had no idea what elastic thread was.  


I love how the shirt turned out so far.  If you haven't tried Ottobre Designs, you really should.  Their patterns have such amazing little details that really make the outfit and their directions for finishing really make it look professionally done.  I find it great that most of their items look like more everyday kid comfortable that you could find in most any store, in contrast to lots of sewing patterns that seem to be ultra frilly and ruffles galore.  Don't get me wrong, I like ultra frilly in the right time and place, but I find it hard to incorporate in regular every day wear.  Anyways, back to the shirt.  Eleanor loves it!  Lately, she has been really into princesses and crowns.  She even makes some out of her Duplos.  And I thought that the main fabric was perfect, since it has little crowns on it.  When she tried it on, she pretended to put on the crown.  It was so cute!


Day Six. Sabbath and party.  (I had to include Day Six, even though I didn't sew, because I'm too OCD to not to). 

Day Seven, I got one pair of jeans cut out.  I'm using a light weight denim so that they will be comfortable for her and not too stiff.  I'm not to keen on the pocket the pattern has so I'm going to try the Bow Pocket Tutorial by Simple Simon and Co.  Hopefully, it will turn out super cute.

Source

Maybe later on today I'll get more done on the jeans, but for now I am just going to read a story to my girlies.

Monday, September 10, 2012

Ice Cream Kit

Thanks to camp cancelling that last week, we got to go to a wedding!  So I needed to come up with a wedding gift.  A while ago, I came across this great link on Pinterest and knew that it would be so fun to make and give.
Family Bites
After buying a bunch of fun ice cream toppings and repackaging everything but the bottles, I arranged them in a basket with some crinkled shredded paper filler.  I repackaged the waffle cones in some clear plastic wrapping paper and tied them with baker's twine.  The candy and nuts I put in resealable sandwich bags and rolled down the tops and taped them.


I thought about taking the labels off the hot fudge and cherries and put new ones on them and everything else like in the original pin, but I got too lazy.  But I did print some great gift tags I also found on Pinterest.

Eat Drink Chic
After printing them, I trimmed them a little and then used a glue stick to glue them to the inside of a pretty blank card.  You could also print on the blank side of some pretty paper or glue on scrapbook paper.  Once dry, I cut them out and used a hole punch for where the twine would go.


 I also used the other half of the blank card to write a note to the happy couple, folded it in half, put two holes on the open side, and tied it closed with more twine (unfortunately I forgot to take a picture).  The last thing I did was wrap in more plastic and tied it closed with more twine.


Before making a bow I slide the tag on.


I think it turned out pretty cute.  Hopefully, the bride and groom agree.